

CamStudio is a tool for recording screen
activity into standard AVI video files. If you move the cursor, launch a new
program, type some text, click a few buttons, or select some menus -- anything
that you see on your screen -- CamStudio will be able to record all these and
allow you to play them back later on.
You can use CamStudio to
·
demonstrate features of
a new software
·
create movies used in
user trainings
·
track the progress of a
program that executes for a long time
·
record the sequence of
steps that cause the occurrence of bugs in faulty software
·
record a movie stream
·
convert AVI files to
Flash (SWF) files.
Contents
- GETTING
STARTED
- SYSTEM
REQUIREMENTS
- INTRODUCTION
- USES OF
CAMSTUDIO
- SETTING
REGIONS
- VIDEO
BASICS
- SETTING
VIDEO OPTIONS
- SETTING
CURSOR OPTIONS
- RECORDING AUDIO FROM MICROPHONE
- SETTING
AUDIO OPTIONS FOR MICROPHONE
- RECORDING AUDIO FROM SPEAKERS
- SETTING
AUDIO OPTIONS FOR SPEAKERS
- ENABLE
AUTOPAN
- KEYBORD SHORTCUTS
- RECORDING THREAD PRIORITY
- PROGRAM
OPTIONS
- SCREEN ANNOTATIONS
·
PRODUCING
FLASH (SWF) FILES:
Convert an
existing AVI file to Flash with the SWF Producer
Getting Started
To start recording, click the red button. A rectangle
will appear for you to select the area you want to record.
![]()
When you want to stop recording, click the blue stop
button. A dialog will appear for you to name and save the file.
![]()
To pause a recording to adjust your screen, click the pause button. You
can resume recording by clicking on the record button again.
![]()
System Requirements
- Microsoft Windows 95,
98, Me, NT 4.0, 2000, XP
- 400 MHz processor
- 64 MB recommended
- 4 MB of hard-disk
space for program installation.
Introduction
Moving images impact our
lives heavily nowadays. A changing image speaks much more than a stationary
snapshot. Any one who has watched a movie understands how the power of
animation can immensely enhance the process of communication. By capturing the
moving action faithfully on your computer screen, CamStudio is essentially
putting this power right onto your computer desktop.
The video files created by CamStudio are saved in the standard AVI
(Audio Video Interleave) format, which is used pervasively in many Windows
applications that support video, including MS Office. (You can effectively paste
an AVI file into an Office application just like pasting text.)
This ensures maximum compatibility with other software, and you can easily edit
the output of CamStudio with a third party video editor.
Uses of CamStudio
- You can create
demonstrations of programs by recording the movement of the cursor, the selection
of menus, the entering of text or the display of messages. These
demonstrations, when shown to users, can illustrate features and usage of
the program in a short period time with maximum clarity.
- The recorded movies
can be added to the accompanying help files of commercial software to make
them more professional.
- The recorded videos,
if converted to a stream-able format, can also be posted to your websites
to enliven them. With broadband becoming more affordable, multimedia
websites are the preferred and more effective means of communication.
Setting
Regions
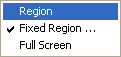
(From
the main menu, choose Regions->Region or Fixed Region or Full
Screen)
You should set the Input Region before recording.
This allows you to define the area and type of video capture. From the main menu, choose Region
There are 3 types of regions you can choose:
1) Region
Before recording starts, you can define an arbitrary
rectangular region with the mouse. The cursor turns into a pen on cross-hairs,
which you use to define a rectangular region on your screen by click-dragging
the left mouse button.
![]()
2) Fixed Region…
You can capture a fixed-size rectangular region. A
dialog allows you to define the size of the region in pixels.

Before the
recording starts, you can move the fixed-size region around the screen to
determine where you want the input area to be. To cancel recording, you can
click the right mouse button.
- If the Fixed
Top-Left Corner checkbox is selected.
Recording
will start immediately when the Record Button ![]() is clicked. The region of capture is
specified by the Left, Top, Width and Height values of the dialog above.
is clicked. The region of capture is
specified by the Left, Top, Width and Height values of the dialog above.
- If the Drag
Corners to Pan checkbox is selected, you can drag either one of the
four corners of the recording region (indicated by the flashing rectangle)
with your mouse during recording.
The mouse cursor will change to a four-pointed arrow when it is
over one of the corners. When this happens, click and drag the region to
the new location.
3) Screen
The entire computer screen is captured.
Video Basics
When you record a movie using CamStudio, you are
actually saving a sequence of bitmaps (known as frames), that, when displayed
in rapid succession, exhibit motion.
If more frames are recorded per second, the resultant
animation will also be smoother. However, this will also cause the file size of
the movie to be much larger.
In the process of recording, CamStudio allows you to
specify two video rates: the input rate and output rate. The input rate tells
your computer how many frames to record per second. The output rate tells your
computer how fast to play them back. Usually, these two rates are equal, so
that the time of playback is equal to the time used in the recording.
However, these two rates can also be different.
Normally, you do this only if you want to create a time-lapse movie. For
example, you can capture a frame once every hour and play the frames back at 20
frames per second.
The default value is set at 20 frames per second for
the output (playback) rate and 20 frames per second (corresponding to 50 milliseconds sleep time) for the input
/capture rate.
There is also a third rate: known as the keyframe
rate. When a frame is saved in an AVI file, they can either be saved as a full
frame, or only as a difference to the previous frame. This keyframe rate
specifies how often full frames are written to the AVI file. A high value means
you can fast forward/rewind to a particular frame in your movie much faster.
But it also means a larger file size.
Setting Video Options
(From the main menu,
choose Options->Video Options)

Setting
the video options allows you to optimize your video recordings by choosing
between the file size, quality and frame rates of your video files.
Auto Adjust
Use
the Auto Adjust settings to set the Key Frame Rate, Capture Rate and Playback
Rate automatically through the slider. Shift the slider to the left to increase
the frame rate and to the right to reduce file size. If the slider is situated
at the right of the Time Lapse indicator, it means you are creating a
time-lapse movie.
In
Time Lapse mode, CamStudio will usually capture a frame only after a long
period of time. (Example: after every
30 seconds). However, during playback, the frames will be displayed more
quickly. (Example: at 20 frames per second).
Compressor
The
Compressor select-box allows you to select the encoder for your AVI file. An
encoder compresses your AVI files to make them smaller in size and cause them
to play faster. The default setting is the MS Video 1 compressor.
Configure
Click this button to configure the parameters of your selected compressor.
The parameters for each compressor is different and some settings will cause
CamStudio’s performance to degrade or behave unpredictably. For some
compressors, clicking this button will not have any effect.
Quality
The
quality setting determines how nicely your picture is saved. A lower value
means a lower picture quality but also a smaller file size. Only some
compressors use this value.
Set Key Frames Every
This
setting specifies the keyframe rate. When a frame is saved in an AVI file, they
can either be saved as a full frame, or only partially as a difference to the
previous frame. The keyframe rate specifies how often full frames are written
to the AVI file. A high value means you can fast forward/rewind to a particular
frame in your movie much faster. But it also means a higher file size.
Capture
Frames Every
This field determines the input frame rate. It dictates how long the CamStudio will ‘sleep’ after capturing each frame. One millisecond is 1/1000 of a second.
If
you set this to a large value (for example 1 hour, or 3,600,000 milliseconds),
you practically create a time-lapse movie. CamStudio will actually ‘sit and
watch’ for activities on the screen that takes a long time to occur and take a
snapshot (say, only once every hour).
Playback Rate
This
field determines the output frame rate. It specifies how many frames are played
back per second. A higher value means a smoother playback. Typical values of 20
– 30 frames per seconds are adequate for most purposes.
Setting Cursor Options
(From the main menu,
choose Options->Cursor Options)

Setting cursor options can help illustrate the action you are recording
by drawing attention to the area where the action happens. The following cursor
effects can be selected:
Hide Cursor
The
cursor will be hidden during screen capture
Show Cursor
Use
Actual Cursor – The actual shape and
position of the cursor will be recorded during screen capture.
Use
Custom Cursor – Replace the recorded
cursor with a customized one.
Use
Cursor From File - Replace the
recorded cursor with a cursor that is loaded from file.
Highlight Cursor
When
this option is selected, the recorded cursor will have a highlight area around it.
This helps in calling attention to the movements of the cursor. You can set the
shape, size and color of the highlight area.
Recording Audio from Microphone
(From
the main menu, choose Options->Record audio from microphone)
You can add a soundtrack to your movie by selecting
this option. When enabled, CamStudio will record your voice input from the
microphone while it is capturing video.
You need a sound card with an attached microphone to use this option.
Setting Audio Options for Microphone
(From
the main menu, choose Options->Audio Options->Audio Options for
Microphone)

Use this dialog box to set the recording format
and compressed format of your audio.
Recording Format -- The recording format is the format your
soundcard use to record your voice from the microphone. Its main attributes are samples per
second (measured in kHz), mono/stereo input, and bits per sample
(usually 8 or 16 bit). Larger values for samples per second and bits
per sample will result in better recording quality, but at the expense of
the movie file size.
Compressed Format -- This is
the format that will be saved with your movie file. You can click on the “Choose Compressed Format” button to select
another compressed format. After recording your movie, CamStudio will attempt
to convert your audio from the recording format to the compressed one.
Your choices for the compressed format are determined
by the recording format. If you change your recording format, the compressed
format will also change automatically.
Interleave Video and Audio –
Interleave your audio and video for smoother playback on a slow device such as
CD-ROM. This will also allow better synchronization of your video and sound
content. The interleave factor determines the amount of interleaving in your
movie. Normally, this value is
specified in number of frames. A value of 1 frame will mean full
interleave. Larger values will mean less interleaving.
You can also specify the Interleave factor in milliseconds.
If you choose to Interleave a movie every 100ms for a movie with
a capture rate of 200 frames per second (Capture Frames Every 5 milliseconds), the Interleave factor will
be equivalent to Interleave every 20 frames.
Volume - Use this to adjust the input
volume of your microphone if your recorded audio is barely audible. If
CamStudio is unable to locate your volume control, you will need to adjust the
volume manually through Start : Programs : Accessories: Entertainment : Volume
Control.
Please note that some configurations of the Recording and Compressed format will result in the audio recording becoming choppy or inaudible.
Some sound card disallows your system to record while another application is playing sound. In this case CamStudio will issue an error when you attempt to record with the “Record Audio” option being enabled.
Use system method for audio recording
If you set this checkbox, CamStudio will use certain
system commands (MCI commands) to perform the recording of audio from your
microphone. This method is more stable and may give better sound quality in
some systems.
If you experience low audio quality when recording
from CamStudio, but managed to obtain high quality recordings from your
system's Sound Recorder, you may want to consider setting this option.
Important
- CamStudio
will ignore all other settings in the Options for Microphone dialog box
(except for the Audio Video Interleave setting) if you choose this
setting.
- Instead,
to adjust the recording source, you will need to set it externally
in the Control Panel->(for Win XP) Sounds and Audio
Device->(Audio Tab)->Default Recording Device.
- If you
set the external recording source to a non-soundcard device (e.g webcam
microphone), you will need to set it back to your soundcard when you want
to record sound from speakers.
Recording Audio from Speakers
(From
the main menu, choose Options->Record audio from speakers)
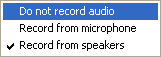
By selecting this option, CamStudio will record the
output from your speakers while it is capturing video. This is ideal for recording a gaming session
or a movie stream. You will need a sound card with speakers attached to use
this option.
Please note that not all soundcards support this
function. (Most modern and branded soundcards usually allows you to record from
your speakers)
Setting Audio Options for Speakers
(From
the main menu, choose Options->Audio Options->Audio Options for Speakers)

Most of the time, you only need to adjust the
Playback Volume and Recording Volume.
Playback Volume
The Playback Volume controls the volume of your
speakers. The sound signals going to your speakers and can originate from a
variety of sources. Examples include sound from CD, Microphone, MIDI playback and Wave playback.
Recording Volume
The Recording Volume controls the volume of the
recording line.
Important: For a good quality recording, it is important that both the Playback Volume and Recording Volume are not set too high.
Recording Line Configuration
In order for CamStudio to record sound from your speakers,
it has to search your soundcard for the appropriate line to use. Failure to find the line simply means that
CamStudio is unable to record from your speakers. Some soundcards do not
support this capability.
The searching is usually done automatically when you
click (Options > Record Audio > Record from speakers). However, if that
does not work, you will have to use one of the two methods provided by
CamStudio below to carry out additional searching.
By clicking the Automatic Search button, CamStudio
will play a few tones and attempt to automatically detect the line.
If you select the Manual Search button,
CamStudio will ask you a few questions on whether you have heard a tone when a
particular line is used. You will need to turn on your speakers and listen
carefully.
Note:
- Normally,
you do not need to perform a search at all because CamStudio will
automatically do that for you when you choose the Record Audio from Speakers option.
- Please
make sure that the Default Recording Device and Default Playback
Device is set correctly to your soundcard. CamStudio makes use of
certain recording functions that depend on this two devices being properly
set. These can be accessed in Control Panel :: Sounds and Audio Devices
:: Audio (Tab) in Win XP. If you have only one soundcard
installed in your system, and have not installed other virtual sound
devices, you usually do not need to be worried about this.
- If the recording is set
incorrectly, you will not get any audio from your speakers.
- If
you are unable to find a line after the Automatic Search and Manual
Search, chances are that your soundcard do not support this function.
- Please
ensure you have installed the latest soundcard drivers to take advantage
of this feature.
Soundcard Device
For most users, the Soundcard Device will already be
pointing correctly at your soundcard. However, if it isn’t or if your system has more than one
soundcard, you will need to set it to the correct one.
If the soundcard device is changed, the recording
line will no longer be valid and you will need to perform a manual/automatic
search for the line
Enable Autopan
(From the main menu,
choose Options->Enable Autopan)
If
this option is selected, the capture area will follow the cursor to wherever it
goes during recording. This has the effect of making the screen capture to
occur at the region with the most action.
Autopan Speed
(From the main menu,
choose Options->Autopan Speed)
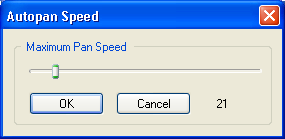
Use
this to control the maximum speed at which the capture area follows the mouse.
The value is measured in screen pixels.
Program Options
(From the main menu,
choose Options->Program Options)
Use
the program options to customize the way the program behave when it starts/stops
recording. A tick beside the menu items indicates that option is enabled.
![]() Minimize program on start recording
Minimize program on start recording
![]() Hide flashing rectangle during recording
Hide flashing rectangle during recording
![]() Save Settings on Exit
Save Settings on Exit
![]() Capture translucent/layered windows
Capture translucent/layered windows
Play
AVI file when recording stops >>
Temporary directory for recording >>
Recording
Thread Priority >>
Name of AVI >>
Troubleshoot …
Save Settings on Exit
The
Save Settings on Exit option allows you to save the program settings
when you exit. These settings will be loaded the next time you launch
CamStudio.
If
you run CamStudio and find that it does not work as well as in previous
sessions, most likely your saved settings is not tuned very well or is
corrupted. You may want to reset your settings by turning off the Save
Settings on Exit option, exit CamStudio, and launch CamStudio again.
Minimizing
CamStudio
CamStudio
is minimized to the system tray instead of the taskbar. To restore CamStudio,
double click its icon in the system tray.

Play AVI file when recording stops
In here, you can
choose to
- Do nothing when the recording stops.
- Play the AVI file when the recording stops
(using CamStudio Player).
- Play the AVI file when the recording stops
(using your system’s default player).
Capture translucent/layered windows
In Windows 2000 or XP, there
are certain windows that are translucent/layered and cannot be captured without
turning this option on. An example is the Office Assistant in Office 2000.
Temporary directory for recording
CamStudio
creates temporary files while it is performing recording. These temporary files
can become very large and crash your system if your system ran out of disk
space.
You can set the directory for placing your temporary files by selecting one of these:
- Windows Temporary
Directory (Usually
C:\Windows\Temp)
- Installed Directory
of CamStudio (Usually C:\Program Files\CamStudio)
- User Specified
Directory
If you are using the User Specified Directory, you should always choose a directory that resides in the drive with the largest free space.
Recording
Thread Priority
Some programs, when set as
the active window, use the system resources so heavily that they cause
CamStudio to be unusable. The frame rate in these cases drop to 0 - 5 frames
per second (even if only a small region is being captured). Examples include some DirectX games or CPU
intensive simulations.
To improve the performance
of CamStudio at the expense of these programs, you can set the recording
priority of CamStudio to Highest or Time Critical. However, doing
this may also affect the performance of your whole system (For example, Windows
may not respond to some mouse clicks on your Desktop). Therefore, for most
cases, this option is best left at Normal.
Name of AVI
With auto-naming, you can now avoid giving a name to every AVI you record. The name of the file will have the following format 1422003_1520_26.avi and is saved in CamStudio’s installed directory.
The name is formed using the system’s date and time of the
recording.
1422003_1520_26.avi means the file is saved on 14th of February, 2003, 3.20 p.m (1520), at the 26th second.
Troubleshoot
This dialog allows you to
diagnose and resolve some problems. Currently, it can handle the following:
- If you find that many of your multimedia
applications record from the speakers instead of the microphone after
CamStudio exits, you can select the checkbox to reset the settings.
For other problems please
refer to our FAQ at
Keyboard Shortcuts
(From the main menu,
choose Options->Keyboard Shortcuts)

Use the above dialog box to customize your shortcut
keys for starting, stopping or canceling your recording operation.
You can also set your keys
for displaying the Next Layout and Previous Layout. For more information on
layouts, refer to the section on Screen Annotations below.
Screen Annotations
(From the main menu,
choose Tools->Screen Annotations)
The
Screen Annotations feature allows you to add captions to your screen during
recording. An example of a screen
annotation is shown below:
You
can display the Screen Annotations dialog box by clicking on the icon ![]() or
or
choose
Tools->Screen Annotations from the main
menu.
To instantiate the shape Orange Gradient, simply double
click on it or drag it out of the Screen Annotations dialog box. ![]()

Screen annotations consist of two main components: Shapes and Layouts.
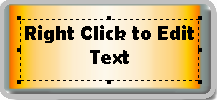
Shapes
A shape is just a floating window that will appear on top of all other windows on your desktop. An example is shown below.

Right-click on a shape to display the context menu
shown below.
|
Right-click on a shape to display the context menu
shown below. |
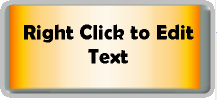
To
create the shape above, simply double click on the item Orange
Gradient or drag it out of the Screen Annotations dialog box.
To
edit the shape, right-click on it to display a context menu
The Clone command allows you to create a copy of
the shape. The Anti-Alias command lets you adjust the rendering
quality of the shape. A higher quality shape will take more time to draw. You can make the shape semi-transparent by choosing Edit Transparency You can edit the shape’s text (message, font color and font
style) by choosing Edit Text ![]()
![]()
![]()
![]()


·
When you have finished editing
the shape, you can save it with the Save command.
·
The Close command
will close / hide the shape on your desktop.
·
The Close All
command will close all shapes on your desktop.
·
The Refresh
command will redraw the shape.
·
The Save Layout
command will save all the shapes and their arrangement on your desktop into a
layout. Please refer to the Layout section below for more
information.
Select Edit Text from the context menu to change the text of the shape.
Notice the text is surrounded by a dotted rectangle
after you have chosen the Edit Text command. You
can move / resize the dotted rectangle by dragging it with your mouse.

![]()
Clicking on the Font Button allows you to choose the Font Name,
Font Style (Bold, Italic, Underline) and Font Color of the shape’s text. The
three buttons
is used for
setting the alignment of text. The Choose
Language / Encoding button allows you to choose an appropriate font for
your language if it is non-Western (English, French, German etc). This feature
is available only on Win 2000 / XP.
Select Edit Image from the context menu to change the text of the shape.

The
cutout / transparent region allow you to create non-rectangular windows.
It refers to the region that allows the background to show through. There are
two methods to create a cutout region.
1) By Transparency Color
All
areas of the image with the specified transparency color will be made transparent.
For
example, if the transparency color is Black, the image
 will be transformed into
2) By using a predefined shape.
Currently,
the predefined shapes are round-rectangle, ellipse and rectangle.
For
example, a round-rectangle cutout region for the image
will be something like 
For
a predefined cutout region, you can add a border, and set the color and size of
the border.
You
can set the Background color for a shape if the shape does not have an
image.
Otherwise,
you can click the Load New Image button to change the background image
to a new file. The file formats that are accepted are bmp, gif and jpeg.
Select Edit Transparency from the context menu to change the shape’s transparency. This feature is available only in Win 2000 / XP.


Note
that recording a transparent window will cause the frame rate to drop
significantly. You will also have to enable the Program Options ::Capture
Translucent / Layered Window setting for the
shape to be properly captured into the AVI movie.
Select Resize from the context menu to resize
the shape.
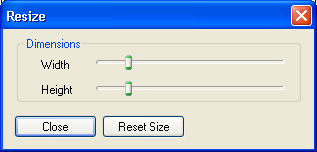
Note that a shape with a large size will be
drawn and displayed very slowly.
In the Screen Annotations dialog box, right click on an item to display a context menu for managing and creating shapes.
You can create a new shape by choosing the New Shape command. Right click to display the context menu. You can Copy, Paste or Remove shapes in the Screen
Annotations dialog box using these commands.
![]()
![]()
![]()
· You can also rename a shape by choosing the Edit Shape Name command or selecting a shape and press F2.
- You can rearrange the order of the shapes
in the list by dragging a shape onto another. For example, to switch the
order of the “Flat Text” and “Dialog”, simply drag “Dialog” onto the “Flat
Text” item.
- The Shape Library command lets you
1) Save all your existing shapes into a file
2) Load a shape library file into the Screen Annotations
dialog box and
3) Create a new (empty) shape library

Note: In the event your default shape library
file CamShapes.ini gets corrupted and is unable to load on startup, you
can restore the default shapes by opening the file default.shapes in
the installed directory of CamStudio.
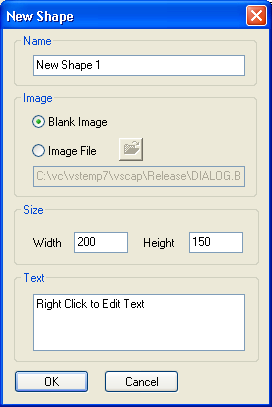
1) Name of the new shape
2) Image of the new shape
3) Size of the new shape and its
4) Initial text
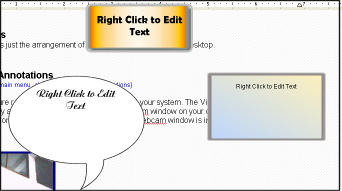
Layouts
A layout is just the
arrangement of one or more shapes on your desktop. An example is shown below
You usually prepare all your
layouts before recording starts. When you start recording, you will click a
hotkey / shortcut key to cycle through the layouts to display the appropriate
captions at the proper time.
You can mange your layout by
clicking on the layout tab of the Screen Annotations dialog.
The Layout Library command lets you 1) Save all your existing shapes into a file 2) Load a shape library file into the Screen Annotations
dialog box 3) Create a new (empty) shape library You use the Copy Layout, Paste Layout and Remove Layout commands to
copy, paste and remove layouts in the Screen Annotations dialog box. Right Click to display the context menu. Layout Tab
![]()
![]()
![]()

- Select a layout and right-click on it to
display a context menu for managing the layouts.
· You can rename a layout by choosing the Edit Layout Name command or selecting a layout and press F2.
- You can rearrange the order of the
layouts in the list by dragging a layout onto another. For example, to
switch the order of the “Layout 1” and “Layout 2”, simply drag “Layout 1”
onto the “Layout 2” item.
You instantiate a layout by
simply double click on the layout item or drag it out of the
Screen Annotations dialog box. By doing so, all the shapes that are saved into the
layout will be displayed on the desktop in their correct order and position.
To save a layout, first,
arrange your shapes in their correct position and order. Right click on
any of the shapes to bring up a context menu, and select the Save Layout
command.
You can cycle through the
layouts by clicking the Next Layout key in the Screen Annotations dialog
box. Every click will close all existing shapes on the desktop and instantiate
a new layout. Alternatively, you can use a hotkey / keyboard shortcuts to
perform the cycling. To customize the keys for navigating the layouts, you can
choose Options->Keyboard Shortcuts from the main menu or Objects->Layout
Shortcuts from the Screen Annotations
menu.
The
keys for cycling through the layouts are
Next
Layout Key – key for displaying the
next layout
Previous
Layout Key - key for displaying the
previous layout
Show
/ Hide Layout Key - key for showing
/ hiding the current layout
Video Annotations
(From the main menu,
choose Tools->Video Annotations)
This feature requires a webcam to be installed on your system. The Video Annotations window is essentially a webcam window. By placing a webcam window on your desktop, you can record its content along with other screen content when the webcam window is inside your recording region.
The Video Annotation window does not only stream video content to your desktop. You can also add a text caption, make a cutout region, or set transparency values (Win 2000 / XP only) to the video annotation just like you did for screen annotations. To do so, right-click on the webcam window to display a menu like this

The Edit Text, Edit Image and Edit Transparency commands have already been covered in the section on Screen Annotations and will not be explained here.

The refresh rate indicates the number of times (frames) CamStudio will attempt to capture an image from your webcam and display it on your screen. The actual rate will usually be much lesser, especially for large sized images.
Important :
· Setting a high refresh rate will degrade the recordings of CamStudio considerably. This is especially true if transparency is turned on. It has been observed that some dialog boxes will not appear when they are selected when the Video Annotation window is shown. To stop the blocking of these dialog boxes, you will need to close the Video Annotation window first.
· The slowdown in the recording rate will be observed even if the Video Annotations window is not inside the recording region. In fact, the presence of the Video Annotations window will even affect the performance of other programs in your system. Therefore, it is highly advised that you close the Video Annotations window when it is not needed.
· Sometimes, especially on slower systems, the video of the webcam images will appear to be slightly behind the audio track on playback. This is because the acquisition of an image and its display on the screen is quite demanding on your system resources. The computer will take some time to process the acquired image before showing it on the screen. This latency problem can usually be resolved by
1) Choosing a smaller dimension for your video format or
2) Shifting the video track slightly to align it with the audio track. More information can be found in the section Audio and Video Synchronization below.
You can use the video source dialog to select your webcam or video source for the video annotation. You can also set the brightness, contrast, gain, exposure and other settings related to your webcam video.
The video format dialog is used for selecting the dimensions of your webcam or video source image. You can also set the pixel depth and compression (e.g RGB24, RGB32) of your video.
Note: You are advised to choose a small dimension
(e.g 160 x 120) for the video format, as a large sized format will slow down
your system significantly.
The video source and video format dialog boxes will vary on different systems. Its implementation will very much depend on the vendor of your webcam.
Audio and Video Synchronization
(From
the main menu, choose Options>Audio Options->Audio and Video
Synchronization)

If the video and audio track of your recording is
not in phase during playback, you can try to shift a stream slightly to make
them back in sync. This may happen if you are recording the output of a
webcam. The amount of shift is measured
in milliseconds, and the appropriate value for the shift can usually be
determined after a few trail recordings with different time shift values.
Note
: The dialog above only handles the case when the audio streams appear
to go before the video.
Some
Notes on the Quality and Performance of the Recording
CamStudio creates a movie by
sampling the screen on fixed-time intervals. If this sampling frequency is too
slow, it may not be able to pick up some cursor movements if the mouse moves
too fast. The result of this will be that the cursor will appear to jump,
become jerky or even cannot be seen in the recorded movie. It is thus advisable
to slow down your mouse movements during recording.
This sampling problem can also
happen when you are recording a fast animation. If CamStudio cannot record much
faster than the changes in the animation, CamStudio will miss out on some important
data and the playback will not be smooth.
Frame Rates
The speed of your computer will directly affect the
performance of CamStudio. A slow CPU will unquestionably mean slower frame
rates. For the best performance, use the fastest computer available for
recording.
Apart from CPU speed, the following factors will also
affect the performance of the recording:
- Recording a movie
that covers a large area.
- Recording pictures
that contain many colors in.
- Running other
applications during recording sessions.
File Size
An AVI file usually has a very large file size,
especially for those lengthy and detailed videos. This is due to the fact that
a video file has to pack hundreds and thousands of images into a single file.
It is thus very common to have size exceeding one megabyte.
To reduce the size of the AVI file, you can do the
following:
- Limiting the area
of the region being captured.
- Limiting the
(input) rate of which video frames are captured. This can be set in the Capture
Frames Every field of Video Options
- Changing the
compressor and compression quality.
By changing the compression quality, you are essentially making a
tradeoff between picture quality and the file size.
Producing Flash (SWF) Files:
CamStudio
allows you to produce Flash files in two ways
To
record directly to Flash, simply click the ![]() button to toggle the recording mode to
button to toggle the recording mode to ![]() .
.
After
that you may proceed in the same way as you record an AVI file.
There
are a few options that you can adjust prior to recording to Flash. These are accessed with the Options :: Record to Flash commands in the menu.

The Preview SWF File upon
completion instructs CamStudio to display your Flash movie in a HTML file
when the production is completed.
The process of recording to SWF
actually involves multiple steps. CamStudio in fact record your screen activity
to an intermediate AVI file first, before converting it to a Flash (SWF)
file. The Delete the intermediate
AVI file upon completion setting thus instructs CamStudio to delete the
intermediate AVI file when the conversion is completed. You may want to
preserve the AVI file just in case you’ll like to edit it in an AVI editor, but
that will take up plenty of space on your hard disk, as the format of the AVI
is saved with minimal compression settings.
The production an SWF file is
affected by many parameters in the SWF Producer. These parameters are, by
default, hidden from users, but may be revealed if you turn on the Display
conversion options before generating SWF setting. For a full description of
these parameters, please refer to the section on “Conversion Parameters” in the SWF
Producer help file.
2) Convert an existing AVI file to Flash with the
SWF Producer
The CamStudio distribution package includes a module
known as the SWF Producer that is able to convert an AVI file to SWF. This is
actually a separate program that can function independently of the CamStudio
Screen Recorder.
The SWF Producer is launched by
selecting Tools :: SWF Producer from the menu.
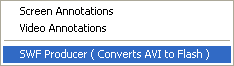
You
can also double click the Producer.exe file in CamStudio’s installed
directory to launch it.
While the SWF Producer works best with the AVI files
recorded with CamStudio, it is in fact capable of converting most AVI files
created by third party products. Normally, Flash files generated by the SWF
Producer results in a much smaller file than the original AVI. For a full description of the usage of the
SWF Producer, please refer to the topic on Standalone
mode in the SWF Producer help file.
CamStudio
Player 2.1
Extended Options
The Camstudio v2.1
player (playplus.exe) can be launched from the command line (DOS prompt) with
the following options:
playplus filename.avi
This will launch playplus.exe and load the AVI file (filename.avi) without playing it.
playplus -a filename.avi
This will launch the AVI file (filename.avi) and play it automatically.
playplus -x filename.avi
This will launch the AVI
file (filename.avi) and play it automatically. The player will exit when the
playback is completed.
![]()
Website of
CamStudio:
CamStudio
is an Open Source product. You
may obtain its source code at:
Frequently Asked Questions:
If
you have more questions regarding the use of CamStudio, please refer to the
following page:
This
product uses code from certain individuals. The authors of this product would
like to express their heartfelt thanks to:
- Joseph M. Newcomer
(Hooks and DLL)
- Chris Maunder
(Hyperlink)
- Franz Polzer (Transparent Window)
- Thomas Holme (How to play
and record sound, fister application)
- The author of the
article Concerning
Video For Windows API
- Daniel Zilcsak (System Tray Icons)
- Kenneth M. Reed (MFC
Wrapper for SHBrowseForFolder)
- Chensu (Audio Mixer
Functions Demo)
- Iwasaki Teruyuki
(Localization of CamStudio)
- Davide Calabro (A
wrapper class for transparent windows)
- Dr. Yovav Gad (The Yovav (Horror) PictureShow)
- Matt Weagle (Using
the List Control)
- Vadim Gorbatenko
(Wrapper for AVICap Window)
- David Fleming (Drag and Drop between and within a
CListCtrl)
- Jesse Ezell
(swfsource SDK)
- The authors of
STLPort (www.stlport.org)
We will also like to thank the following individuals.
- Peggy Tsao (For
adding a chapter on CamStudio to her book)
- Iwasaki Teruyuki
(Translation to Japanese)
- The Patcheur et Koala
(Translation to French)
- Norgia Roberto (Italian Translation)
- Peter Santing (Dutch
Translation)
- Frank Meier (German
Translation)
- K. Peter (Hungarian
Translation)
![]()
If you support CamStudio and will like to see more improvements, you can help by donating
·
Money
This will be used to offset our
o Web Hosting cost
o Development Tools
o Hardware
o Support Time
To donate with your credit card, please click the link below
·
Publicity
o Advertisement Space
o A link or recommendation on your site
o Email to your friends
o Success Stories. If your company/organization has installed multiples CamStudio and find it useful, please send us an email so that we can show it on our site
The link for CamStudio is